Decoherence: Glitching Quantum Interference in py5
2026/7/12
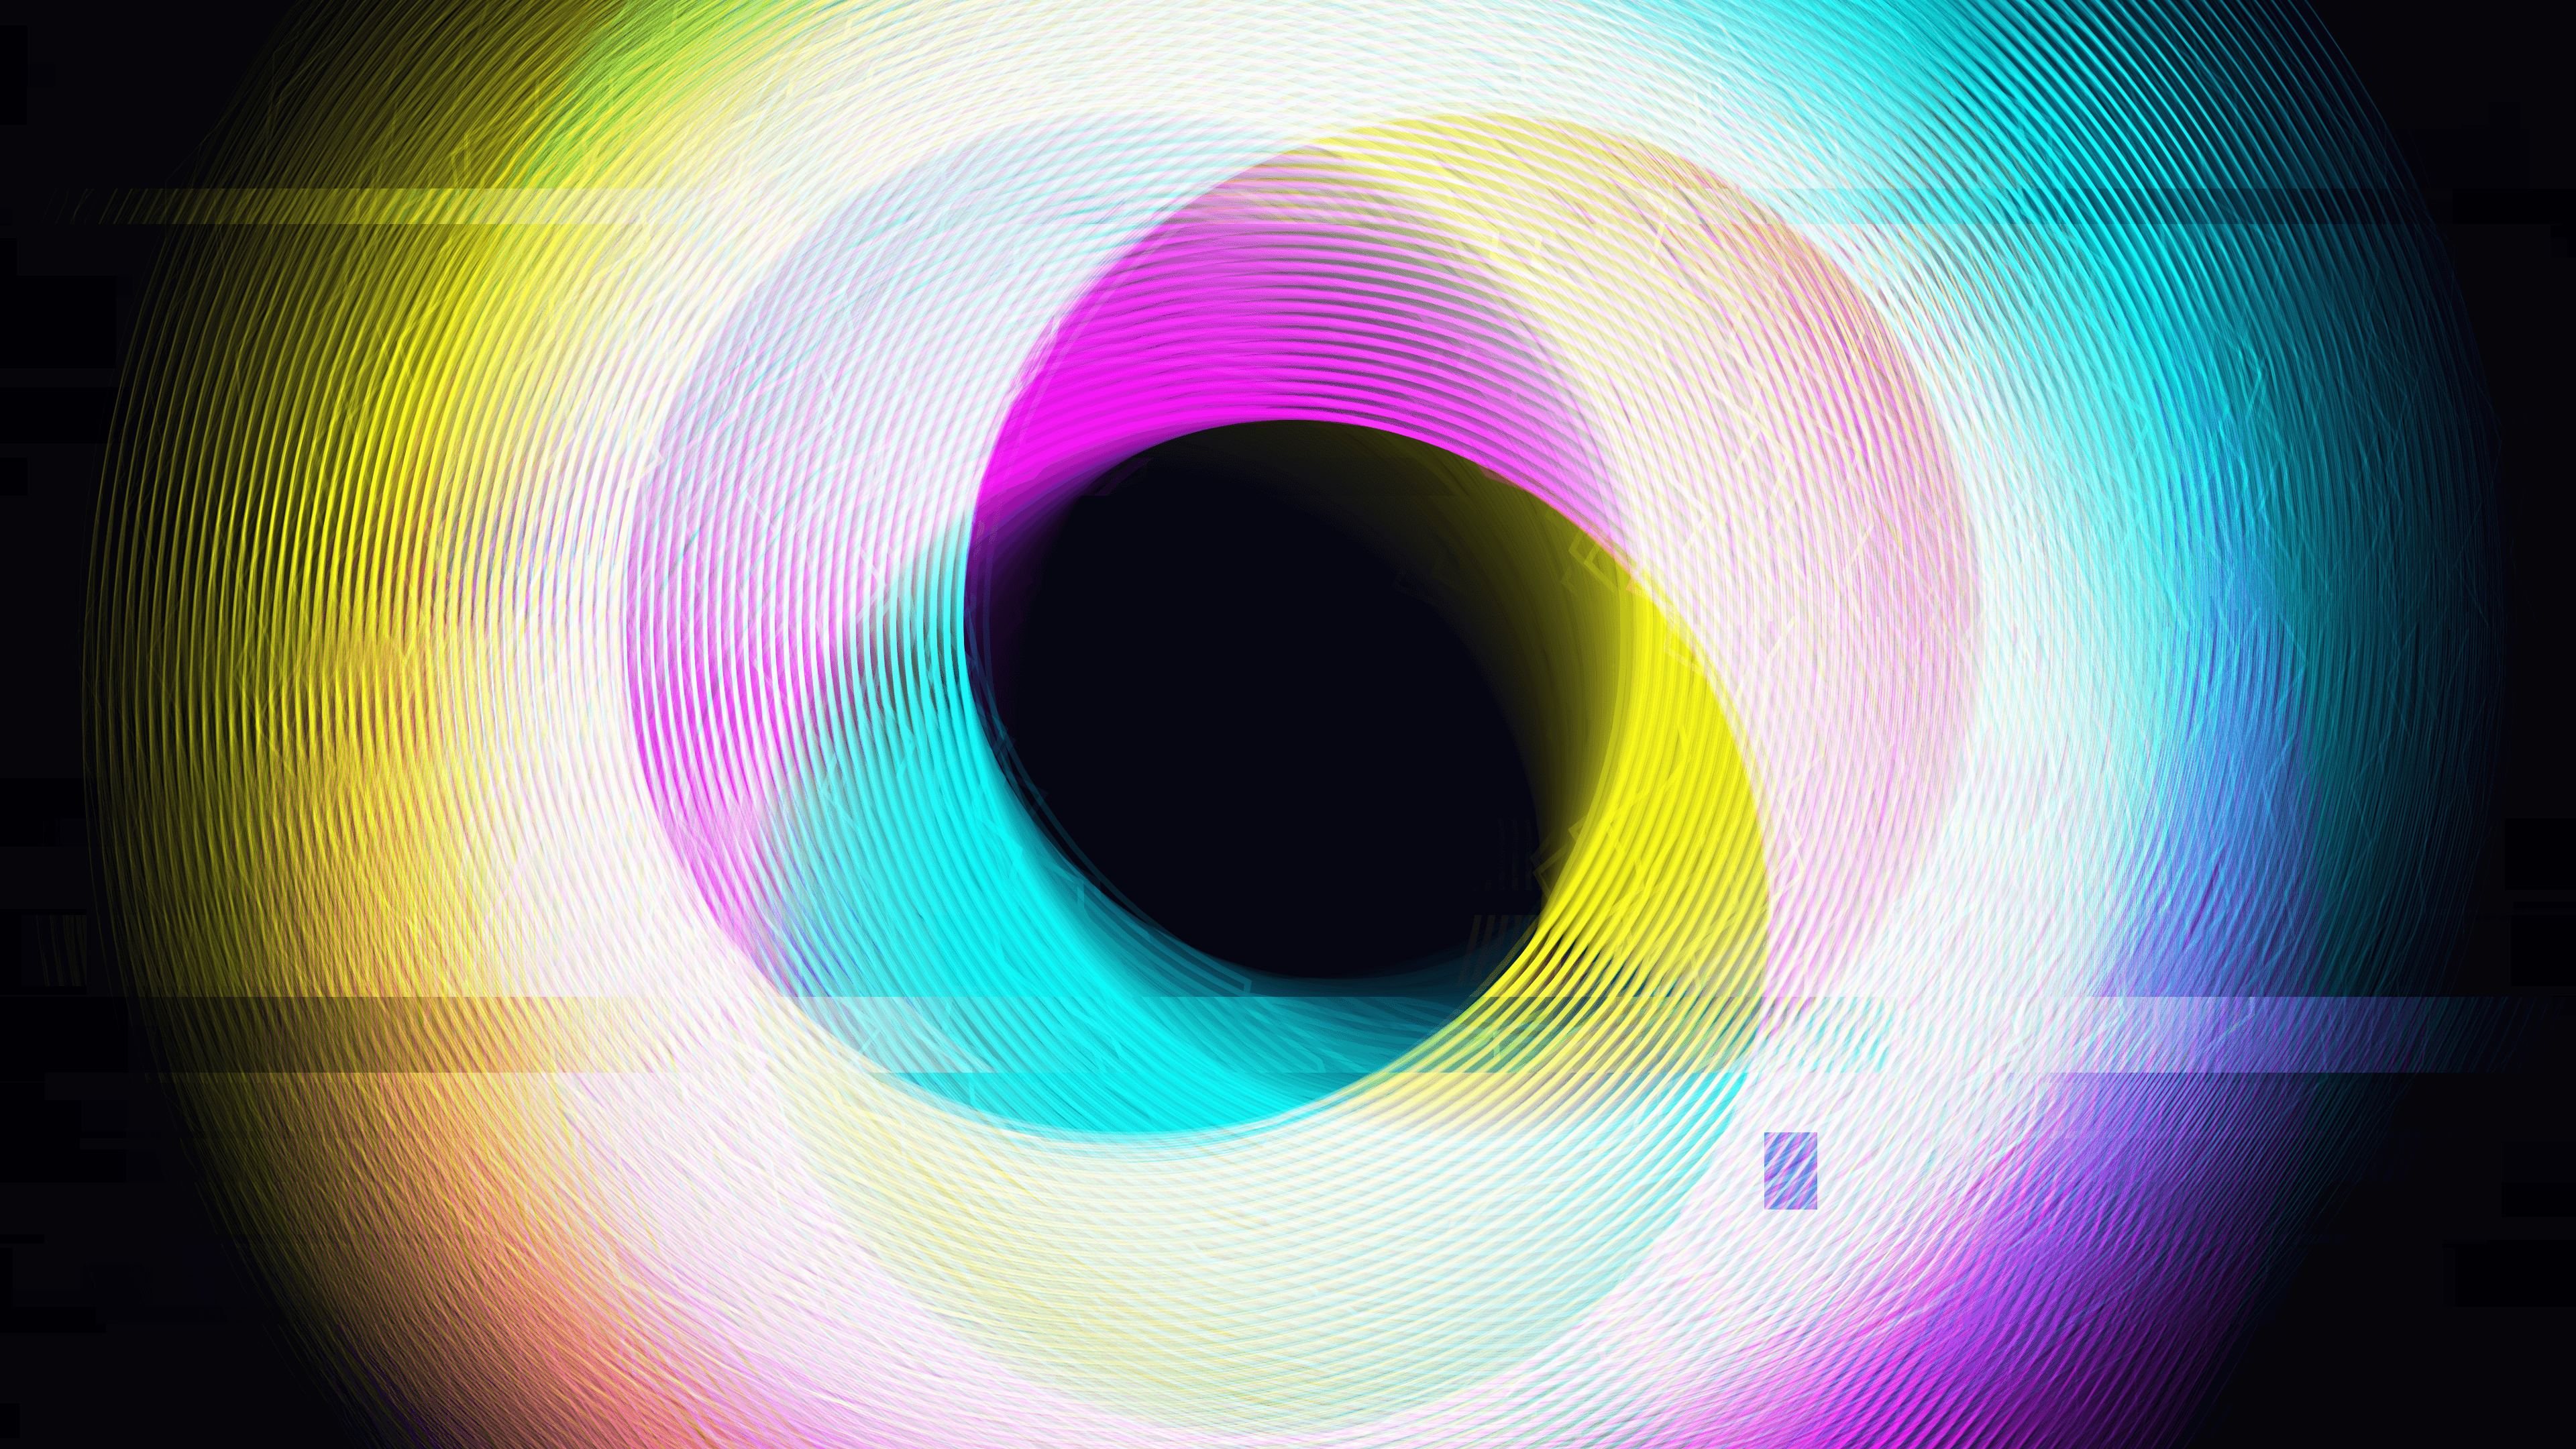
“Quantum Interference Glitch” is a generative media art piece that visualizes one of the most famous and baffling concepts in modern physics: the collapse of the quantum wave function. Inspired by the classic double-slit experiment, the artwork begins by simulating the delicate, harmonious interference patterns of overlapping probability waves. However, the simulation is not designed to remain stable. As the timeline progresses, the “observation effect” intensifies. The pristine mathematical geometry is violently ripped apart by sudden, catastrophic data corruption, illustrating the sudden loss of quantum coherence. Built with Python, py5, and NumPy, the artwork is a stunning exploration of order collapsing into digital decay.
Visual & Aesthetic Approach
The aesthetic of “Quantum Interference Glitch” relies on a stark contrast between smooth mathematical curves and harsh, unpredictable pixel artifacts. The simulation establishes three distinct wave sources, each radiating concentric rings of light across a dark, void-like background. To give the waves an intense, high-energy feel, the artwork uses a strictly digital palette of pure Cyan, Magenta, and Yellow.
Because the rendering uses additive blending (py5.blend_mode(py5.ADD)), the colors behave like true light. Where the expanding rings intersect, they constructively interfere, blowing out into brilliant white hotspots. But as the simulation advances, this pristine optical geometry is violently disturbed. The rings themselves begin to jitter and tear, and massive horizontal blocks of the canvas are suddenly smeared across the screen. The pure CMY colors are intermittently inverted, throwing shocking blocks of inverted light into the dark void. This combination of geometric instability and raw pixel manipulation creates an artwork that feels like a failing simulation of a fragile quantum state.
Code & Technical Breakdown
To create rings that can be geometrically glitched, the code cannot rely on standard, solid circle-drawing functions like py5.ellipse(). Instead, it manually calculates and draws the rings vertex by vertex.
# From draw()
# Sub-segment drawing to allow tearing
py5.begin_shape()
segments = 100
for s in range(segments + 1):
    angle = s * py5.TWO_PI / segments
    x = sx + np.cos(angle) * radius
    y = sy + np.sin(angle) * radius

    # Introduce noise/tearing
    if np.random.random() < glitch_intensity * 0.1:
        x += np.random.uniform(-50, 50)

    py5.vertex(x, y)
py5.end_shape()
Why this works: The code uses trigonometry (np.cos and np.sin) to plot points along the circumference of the ring. However, inside the loop, there is a probability check tied to glitch_intensity (which increases over the duration of the animation). When a glitch occurs, the $X$ coordinate of that specific vertex is randomly thrown up to 50 pixels off-center. Because py5.begin_shape() connects these vertices with straight lines, this sudden shift rips jagged, horizontal spikes out of the otherwise perfectly smooth curve. This ensures that the geometric decay feels structural, as if the mathematical fabric of the wave itself is fraying.
While the geometric glitches affect the shape of the waves, the true destruction is achieved by attacking the raw memory buffer of the canvas using NumPy.
# From draw()
# Datamoshing / Channel manipulation via NumPy
if np.random.random() < glitch_intensity * 0.8:
    py5.load_np_pixels()
    px = py5.np_pixels
    h, w = px.shape[:2]

    # Horizontal shift block
    y1 = np.random.randint(0, h - 50)
    y2 = y1 + np.random.randint(10, 150)
    shift = np.random.randint(-200, 200)

    if shift > 0:
        px[y1:y2, shift:] = px[y1:y2, :-shift]
        px[y1:y2, :shift] = 0
Why this works: By calling py5.load_np_pixels(), the entire rendered canvas is exposed as a 3D NumPy array. The code selects a random horizontal block of the screen (from y1 to y2) and uses NumPy slice assignment to violently shift all the pixels in that block left or right by up to 200 pixels. Because the background is never completely erased between frames (only faded slightly), these massive horizontal shears get baked into the light trails, creating the iconic “datamoshing” effect seen in corrupted video files.
The final layer of corruption specifically targets the color channels, creating the jarring flashes that define the piece.
# From draw()
    # RGB channel inversion
    if np.random.random() < 0.3:
        x1 = np.random.randint(0, w - 100)
        x2 = x1 + np.random.randint(50, 300)
        y3 = np.random.randint(0, h - 50)
        y4 = y3 + np.random.randint(50, 200)

        block = px[y3:y4, x1:x2, :3]
        px[y3:y4, x1:x2, :3] = 255 - block

    py5.update_np_pixels()
Why this works: Within the same NumPy glitch block, the code occasionally selects a random rectangular area on the screen. It extracts the RGB color channels for that specific block (:3) and mathematically inverts them (255 — block). A pixel that was deep space black instantly becomes blinding white; intense cyan snaps to deep red. When py5.update_np_pixels() writes this manipulated array back to the screen, it creates hard, rectangular flashes of inverted color that perfectly capture the chaotic, high-energy breakdown of the simulated quantum system.
Conclusion
“Quantum Interference Glitch” demonstrates the immense creative potential of treating the canvas not just as a drawing surface, but as a manipulable data structure. By establishing a fragile mathematical order and then systematically ripping it apart using raw NumPy array manipulation, the artwork captures the terrifying and mesmerizing beauty of digital decay. The synergy of py5’s high-level procedural drawing and NumPy’s low-level memory access provides the perfect toolkit for simulating system failure, illustrating how the collapse of order can be just as beautiful as its creation.
GitHub: https://github.com/asamiile/py5-media-art/tree/main/sketch/quantum_interference_glitch
Purchase assets: Adobe Stock